Updated:
May 20, 2022
Adding a new domain in Aliases
In Aliases you're allowed to add your custom domains to create all of your personalized aliases. If you've ever purchased a domain in the past and managed DNS this will be simple.
If you've never done this before, fear not it's really very easy!
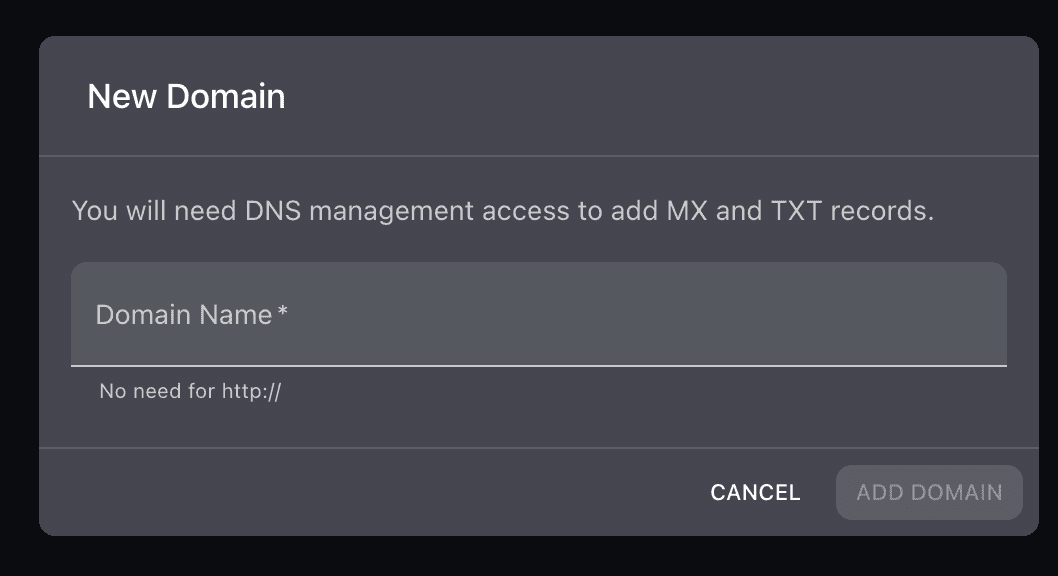
Create a domain
In Aliases, create a new domain, all that's required is the domain name itself.
Domain DNS Records
Watch a quick tutorial video showing how to activate your domain:
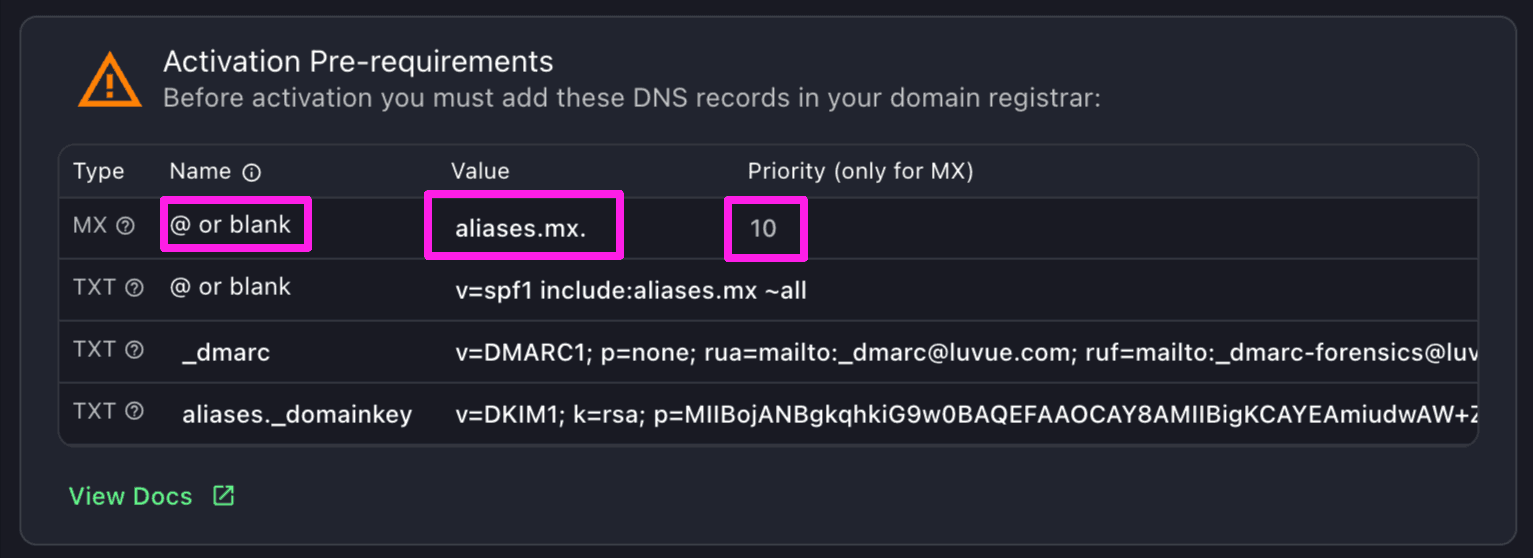
After you create your new domain, you’ll see a message with 4 DNS records (1 MX Record and 3 TXT Records)
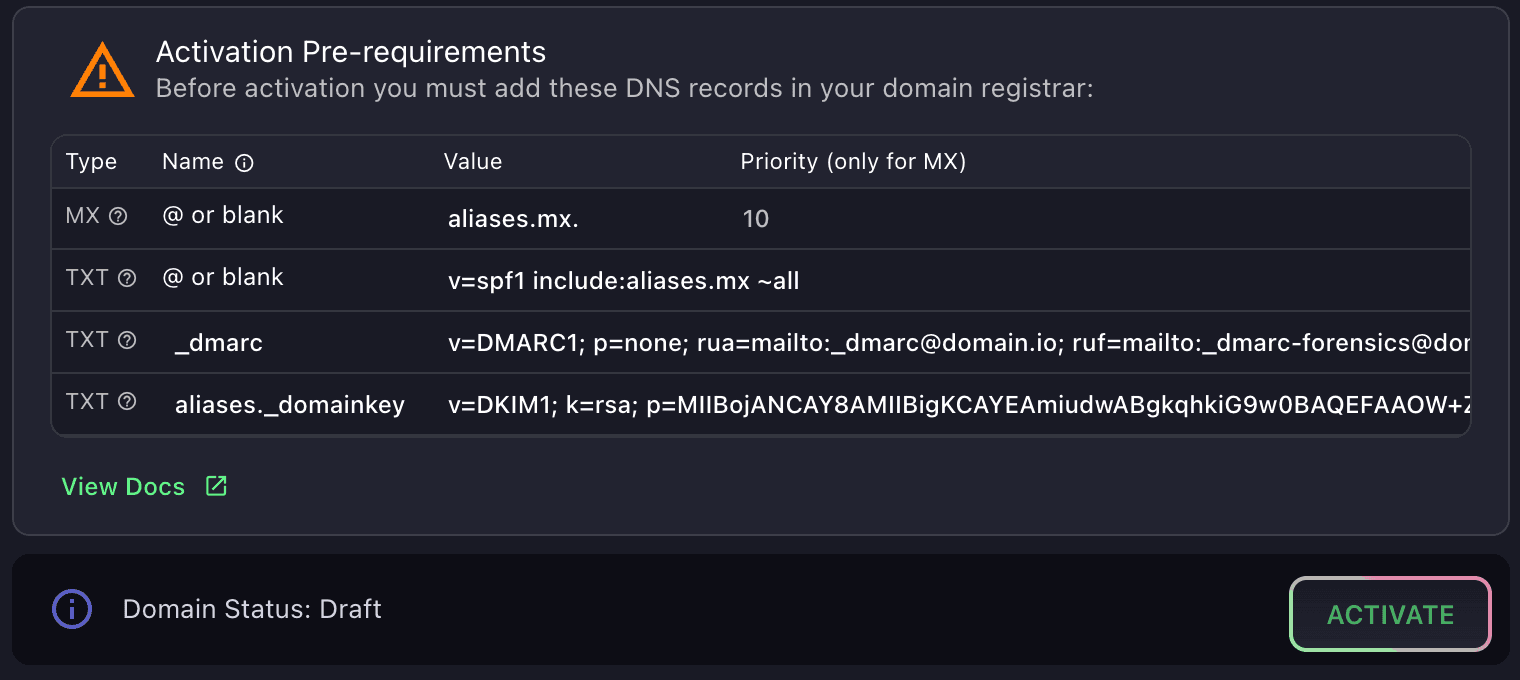
TIP: you can click to copy the names and values
Adding DNS records to your domain registrar
Login to your domain registrar and use the DNS manager to add these 2 records from your domain:
MX record: This MX Record is responsible for accepting email messages for a domain. Set TTL to 1 hour and priority to 10.
TXT record: This TXT Record is an SPF (Sender Policy Framework) Record used to prevent spammers from sending messages with fake addresses on your domain.
TXT record: This TXT record defined how strictly DMARC should check messages. Recommended actions for the receiving server, when it gets messages that fail authentication checks.
TXT record: This TXT record authenticates sent emails within the Domain-based Message Authentication, Reporting, and Conformance (DMARC) protocol.
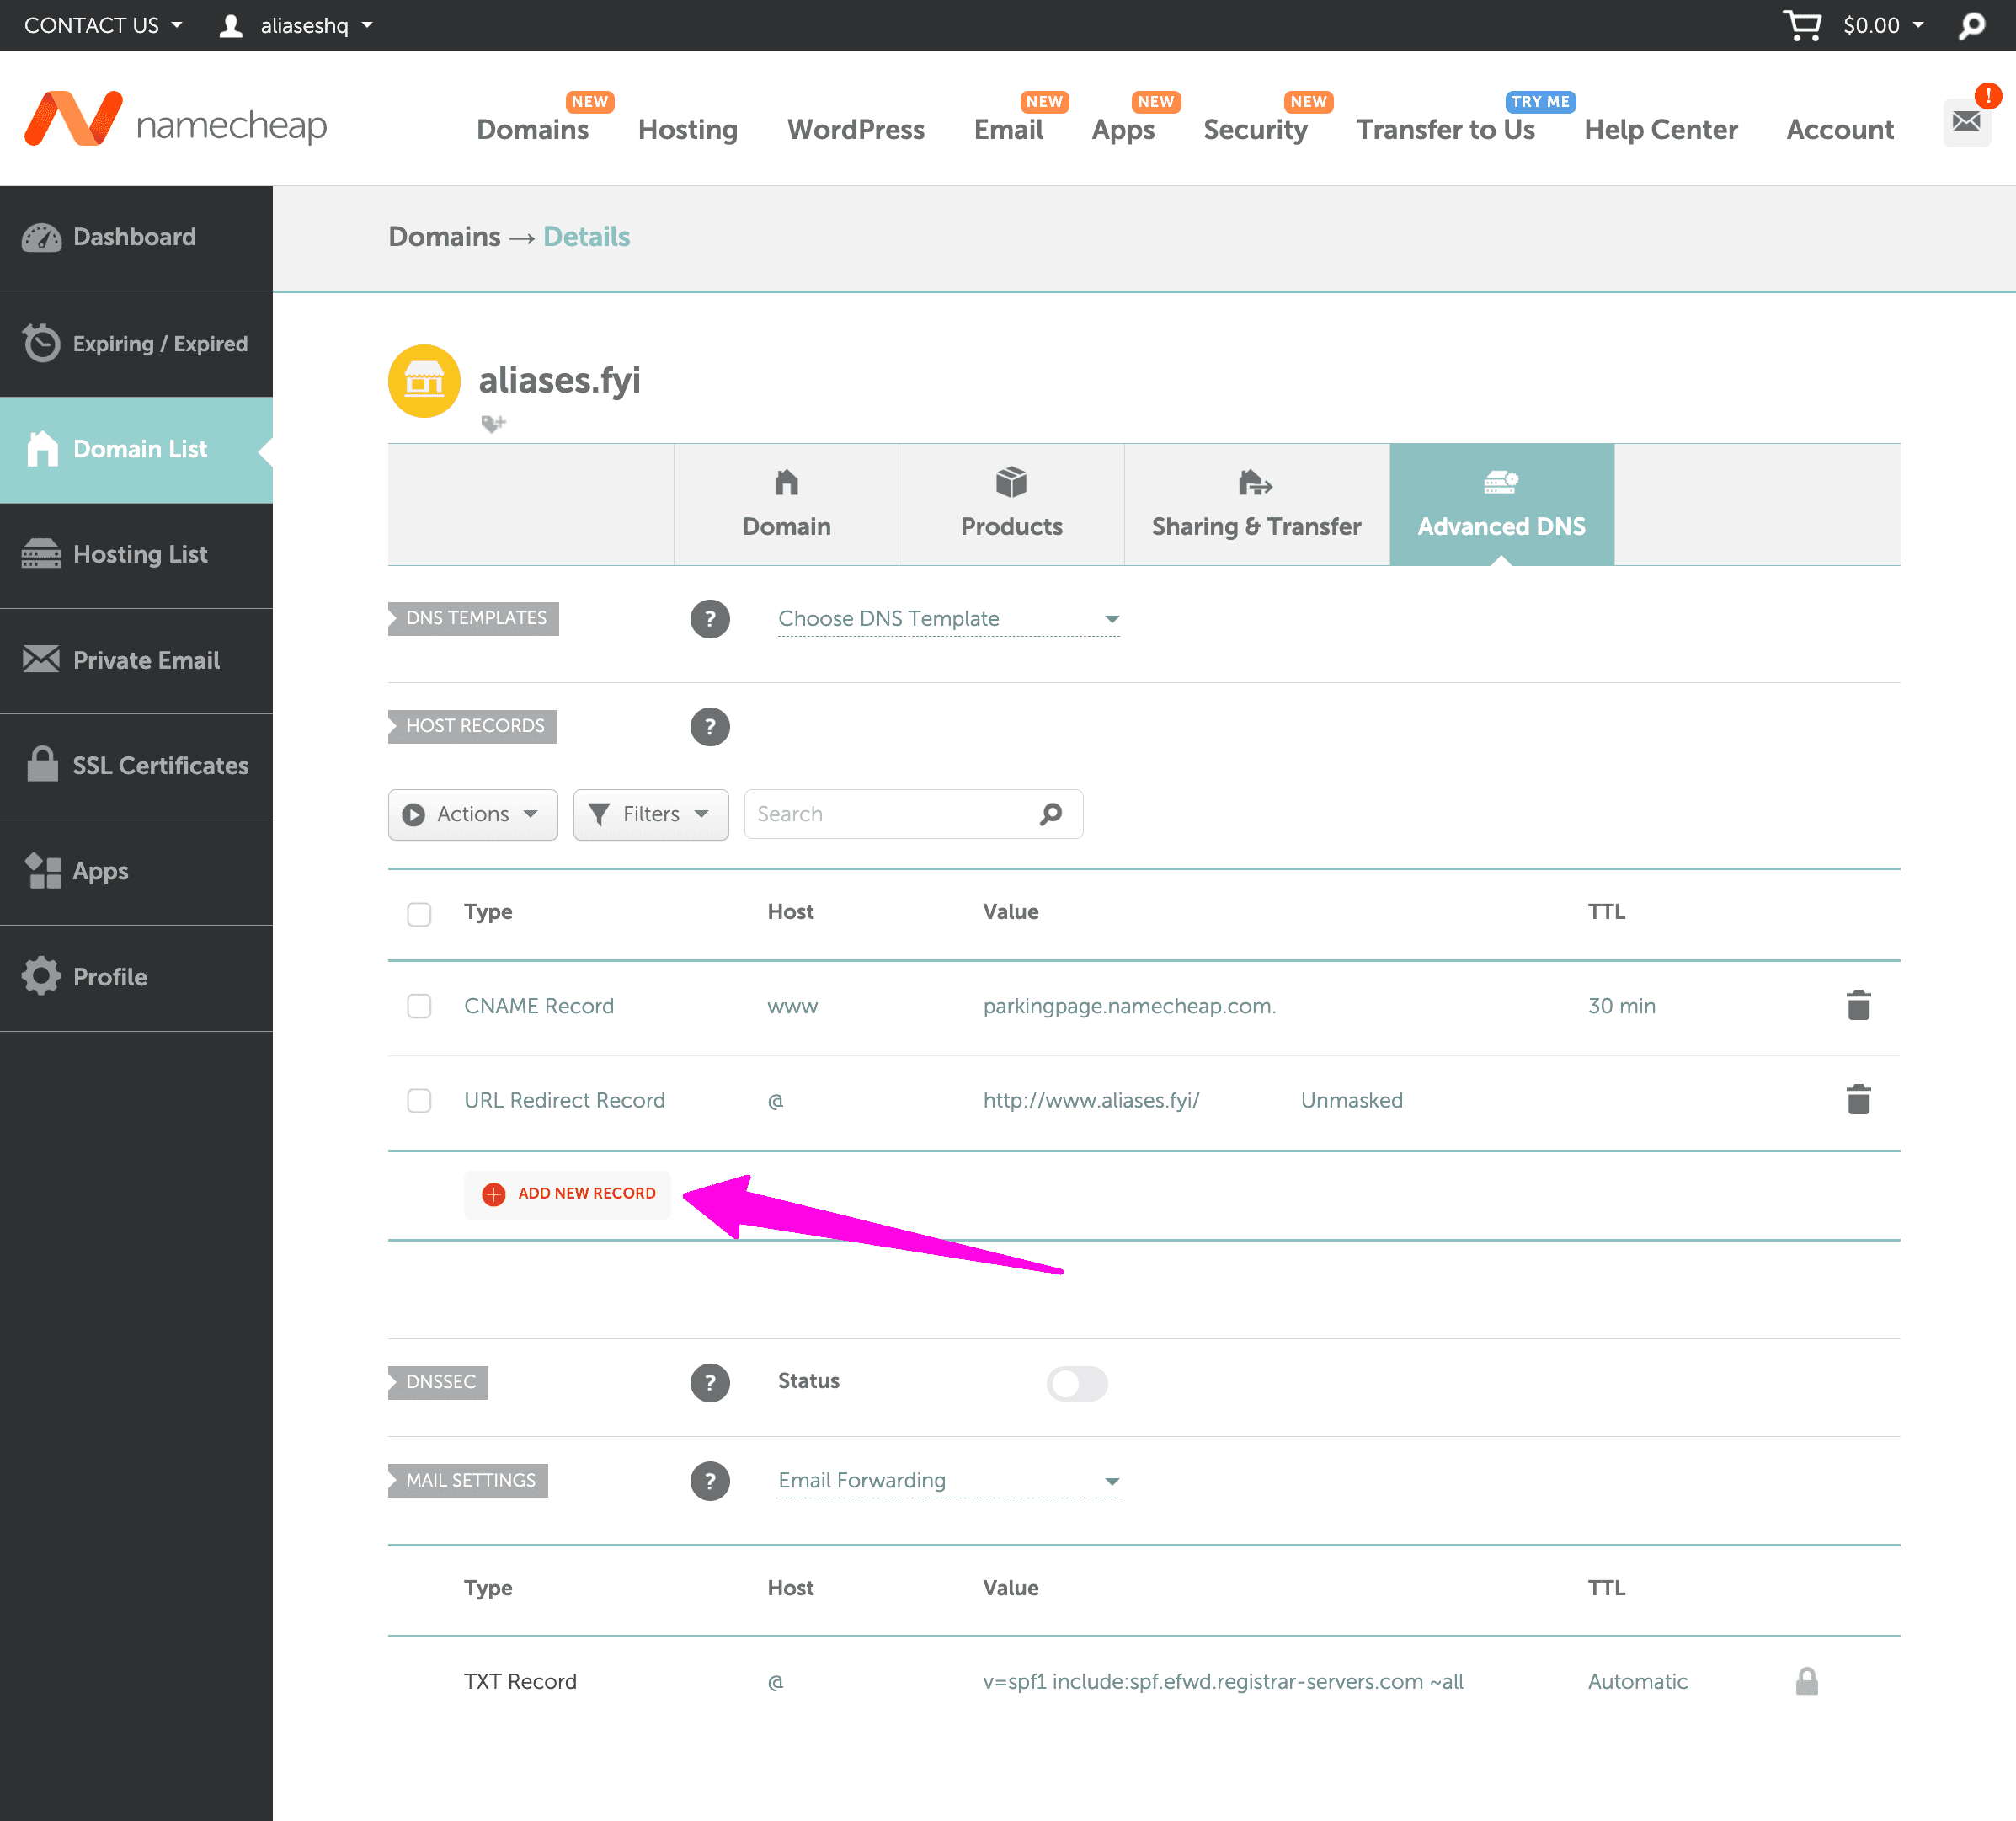
Here's an example from NameCheap.
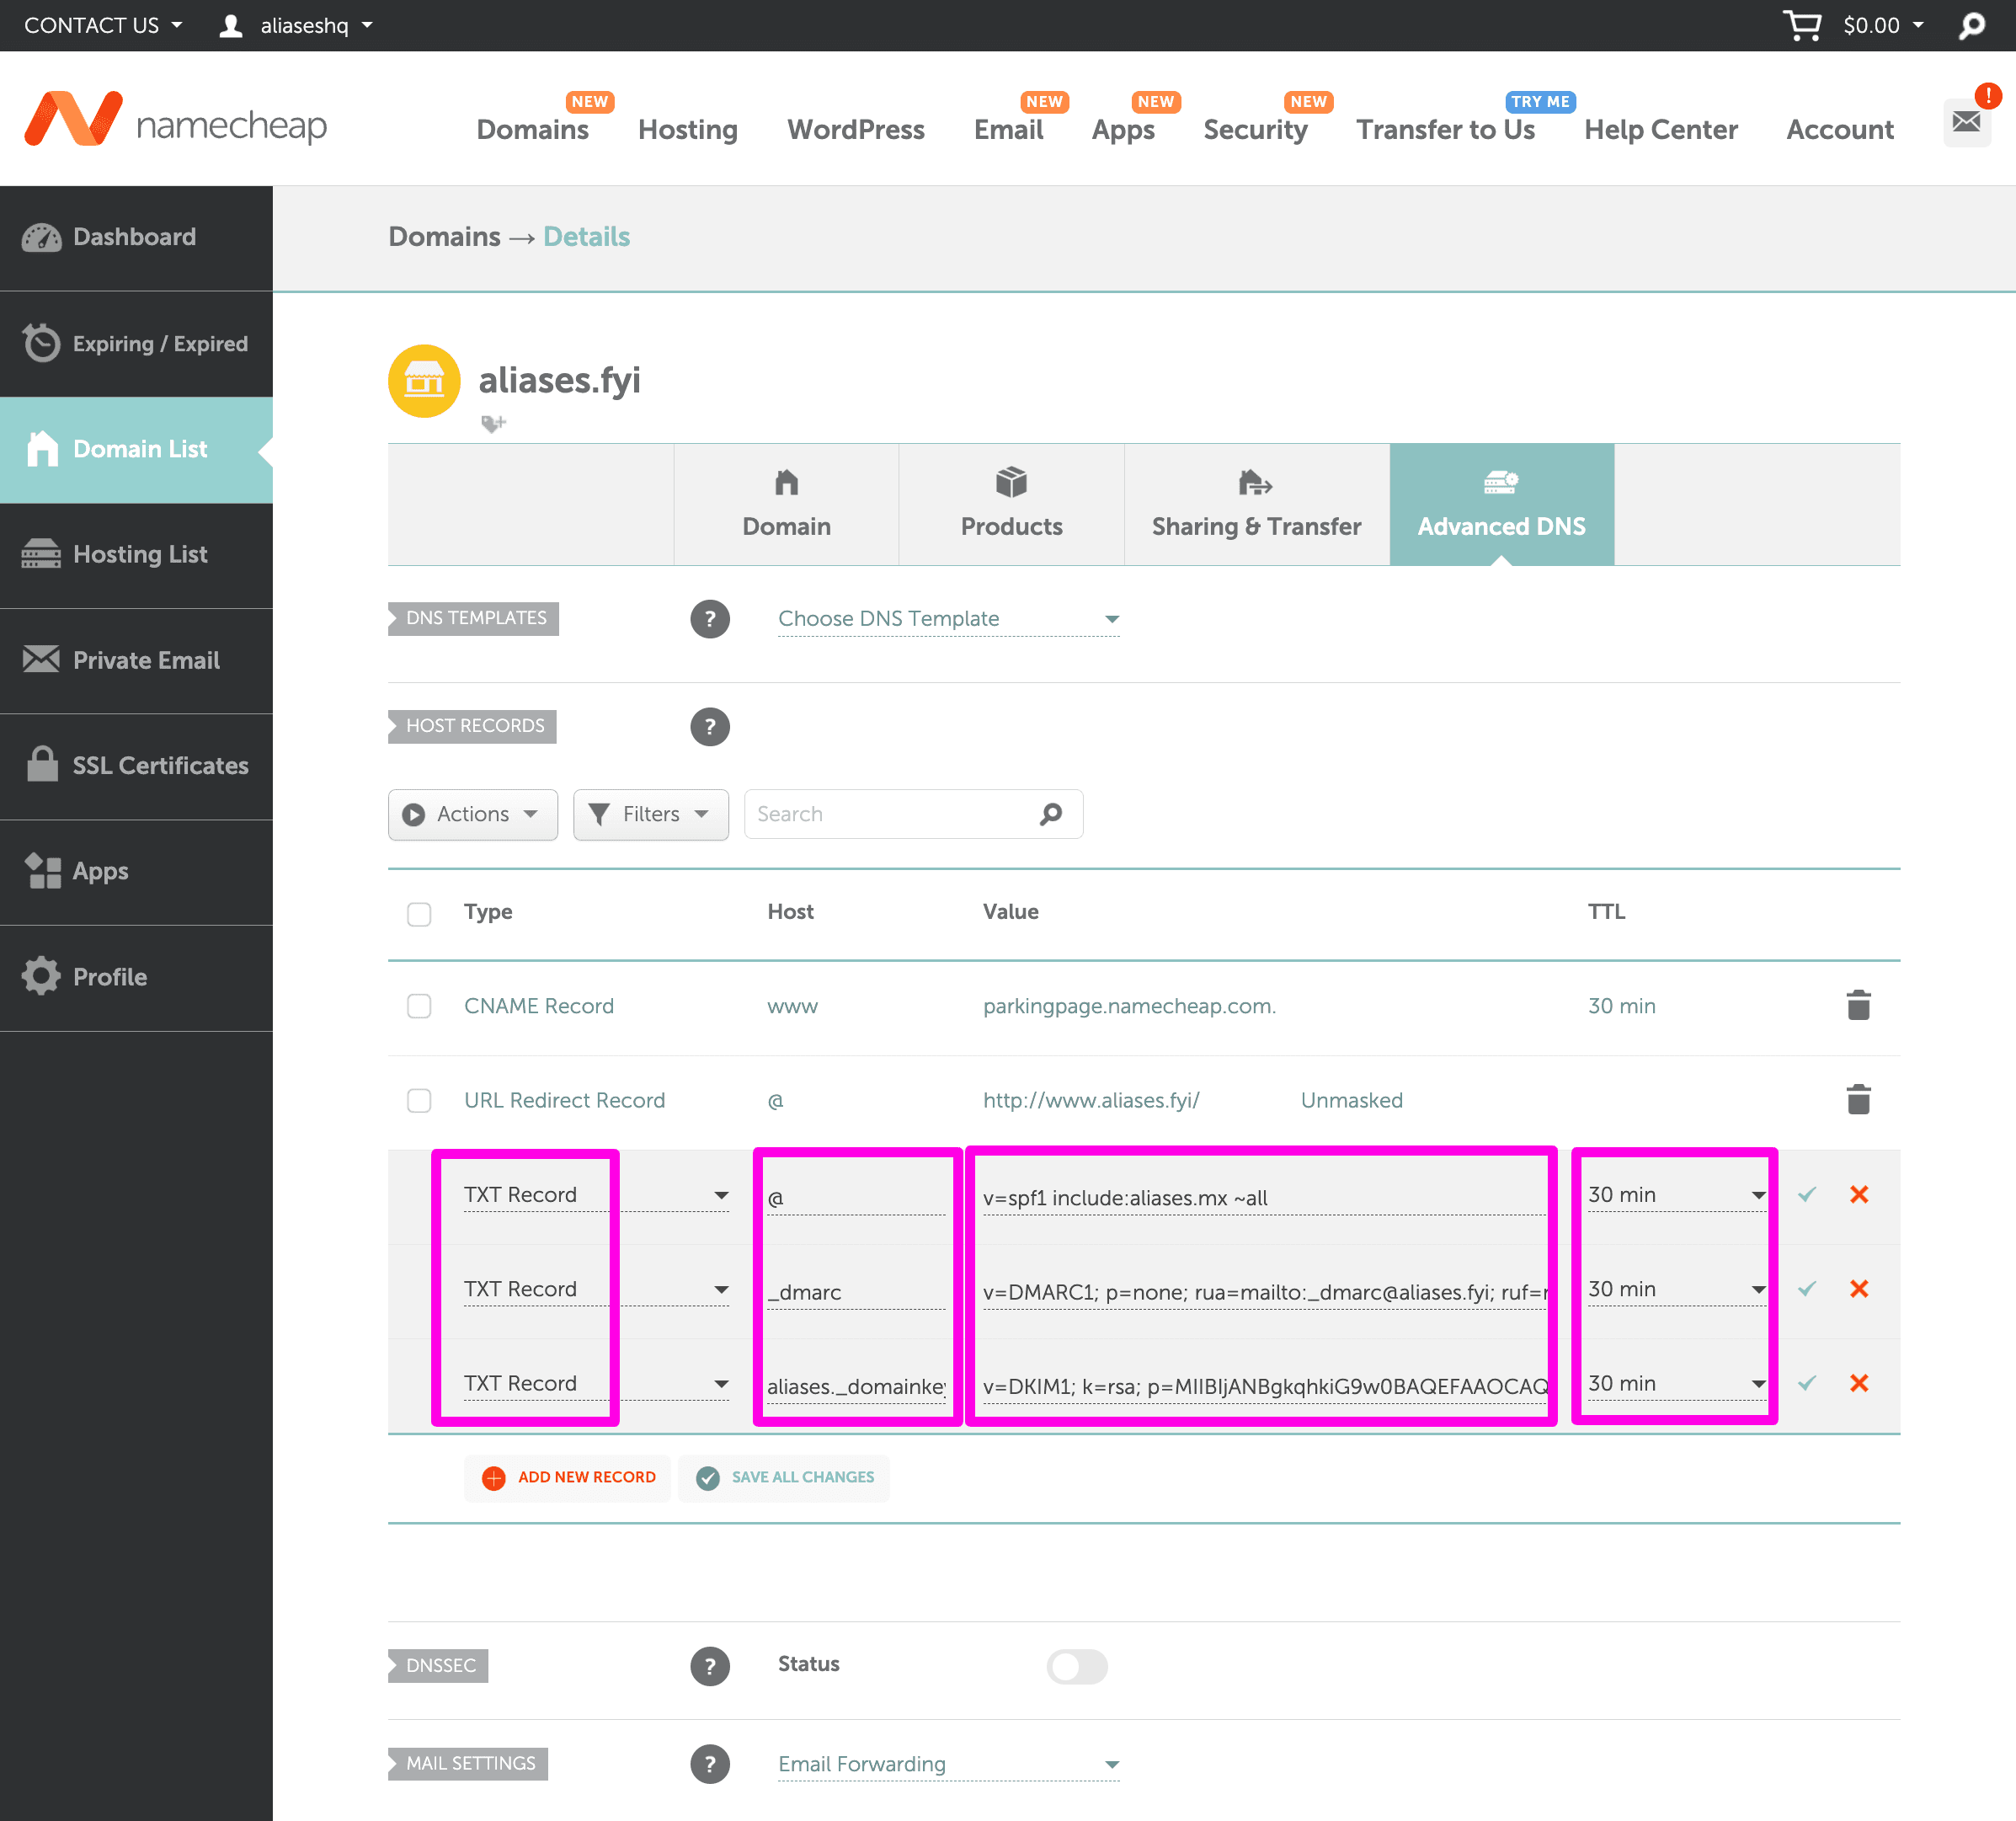
Navigate to Advanced DNS, and under Host Records click "Add New Record" 3 times for 3 new TXT records:
Back in Aliases, copy the Names for the Host and corresponding Values for each:
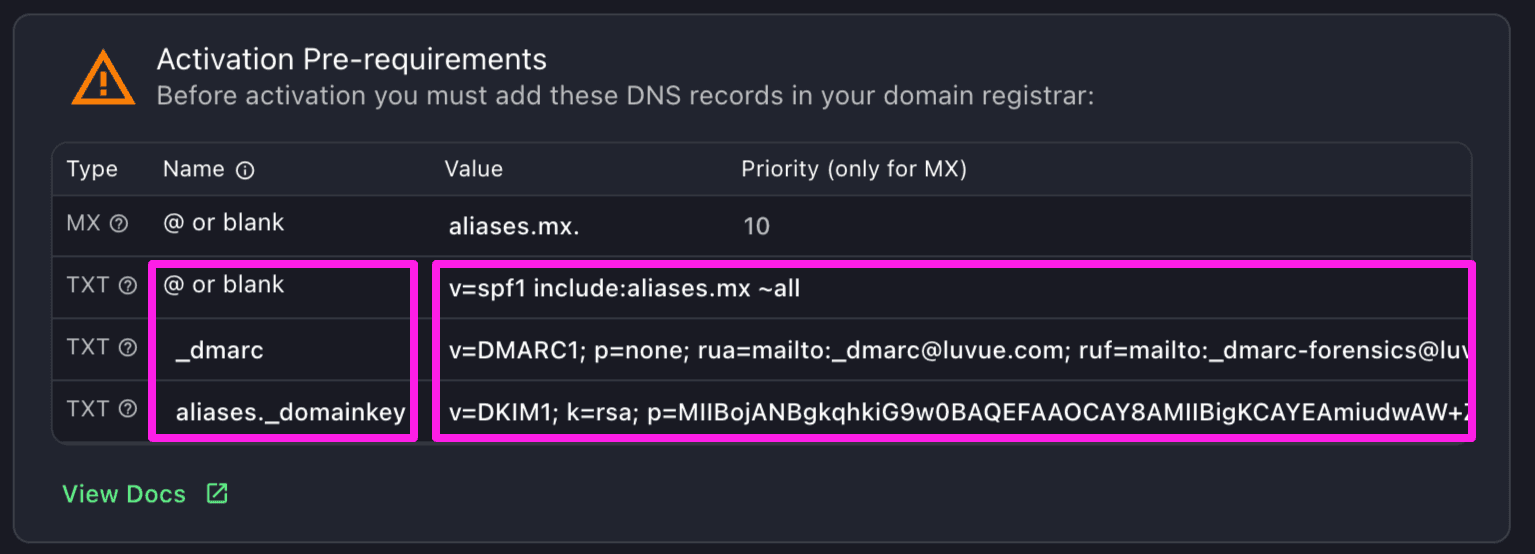
paste them into the proper field, and set each TTL to 30 min:
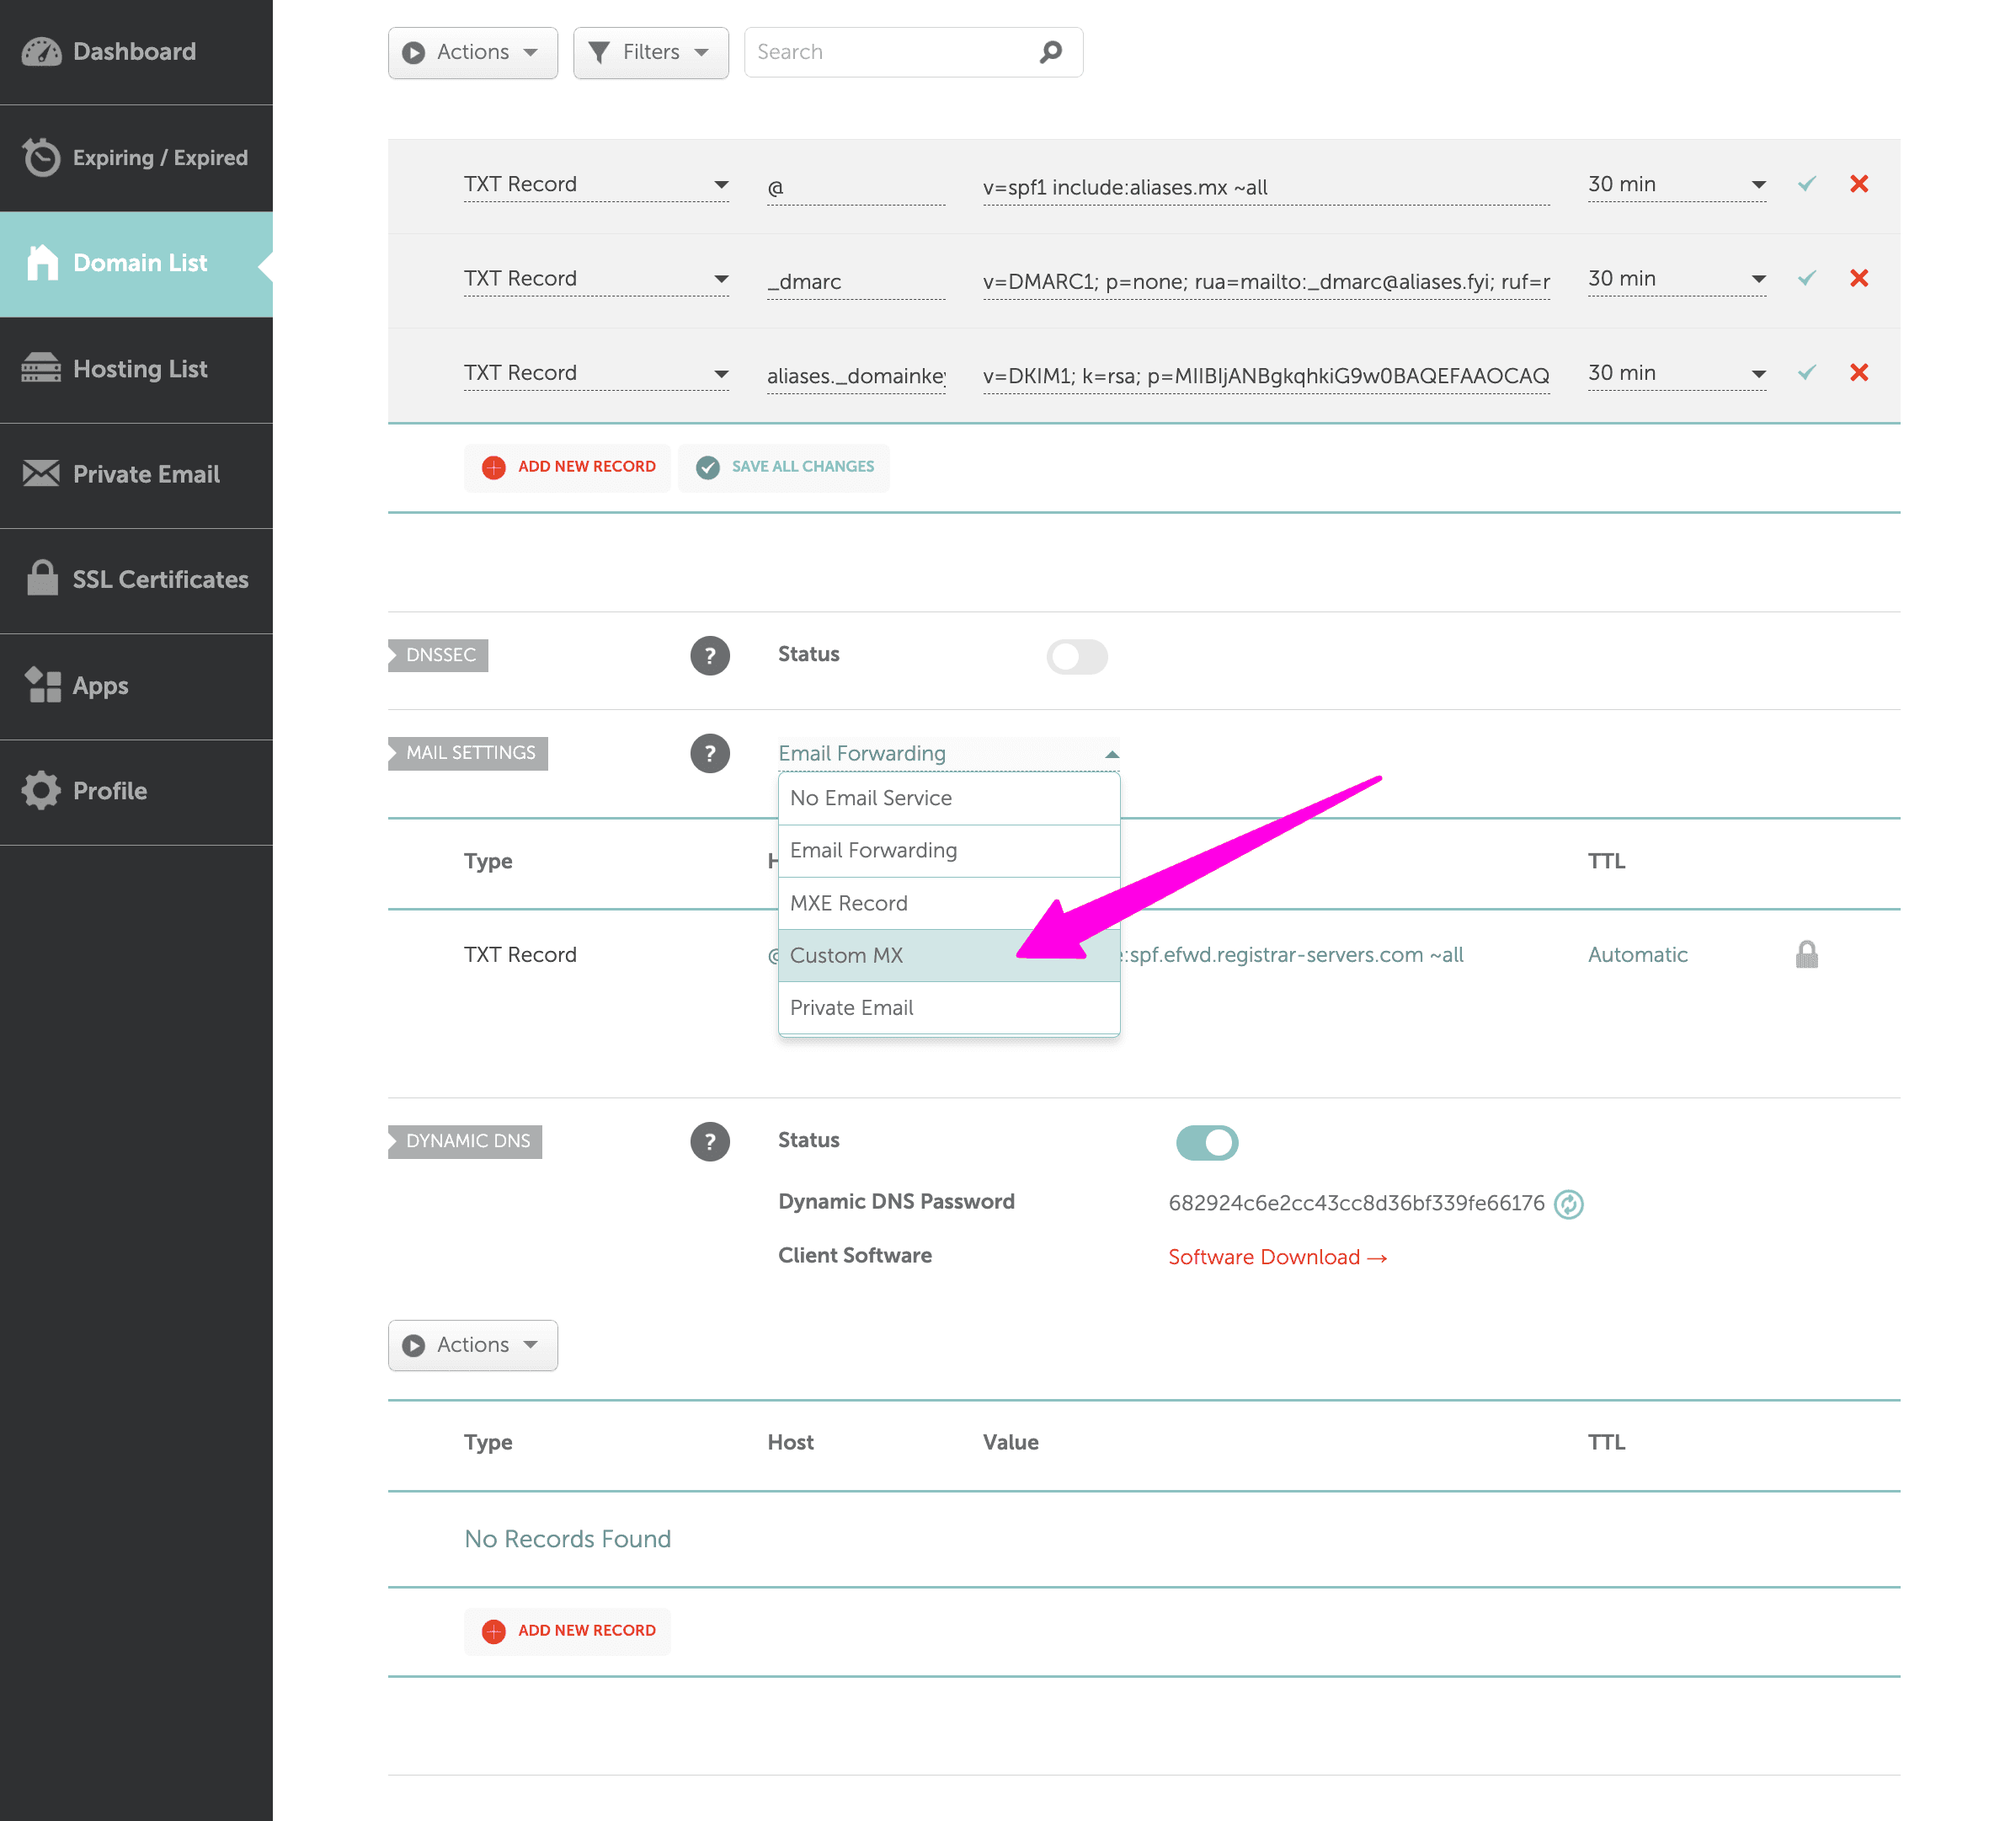
Back in Aliases, copy the MX record information:
and in NameCheap, scroll down to the Mail Settings section, and change "Email Forwarding" to "Custom MX"
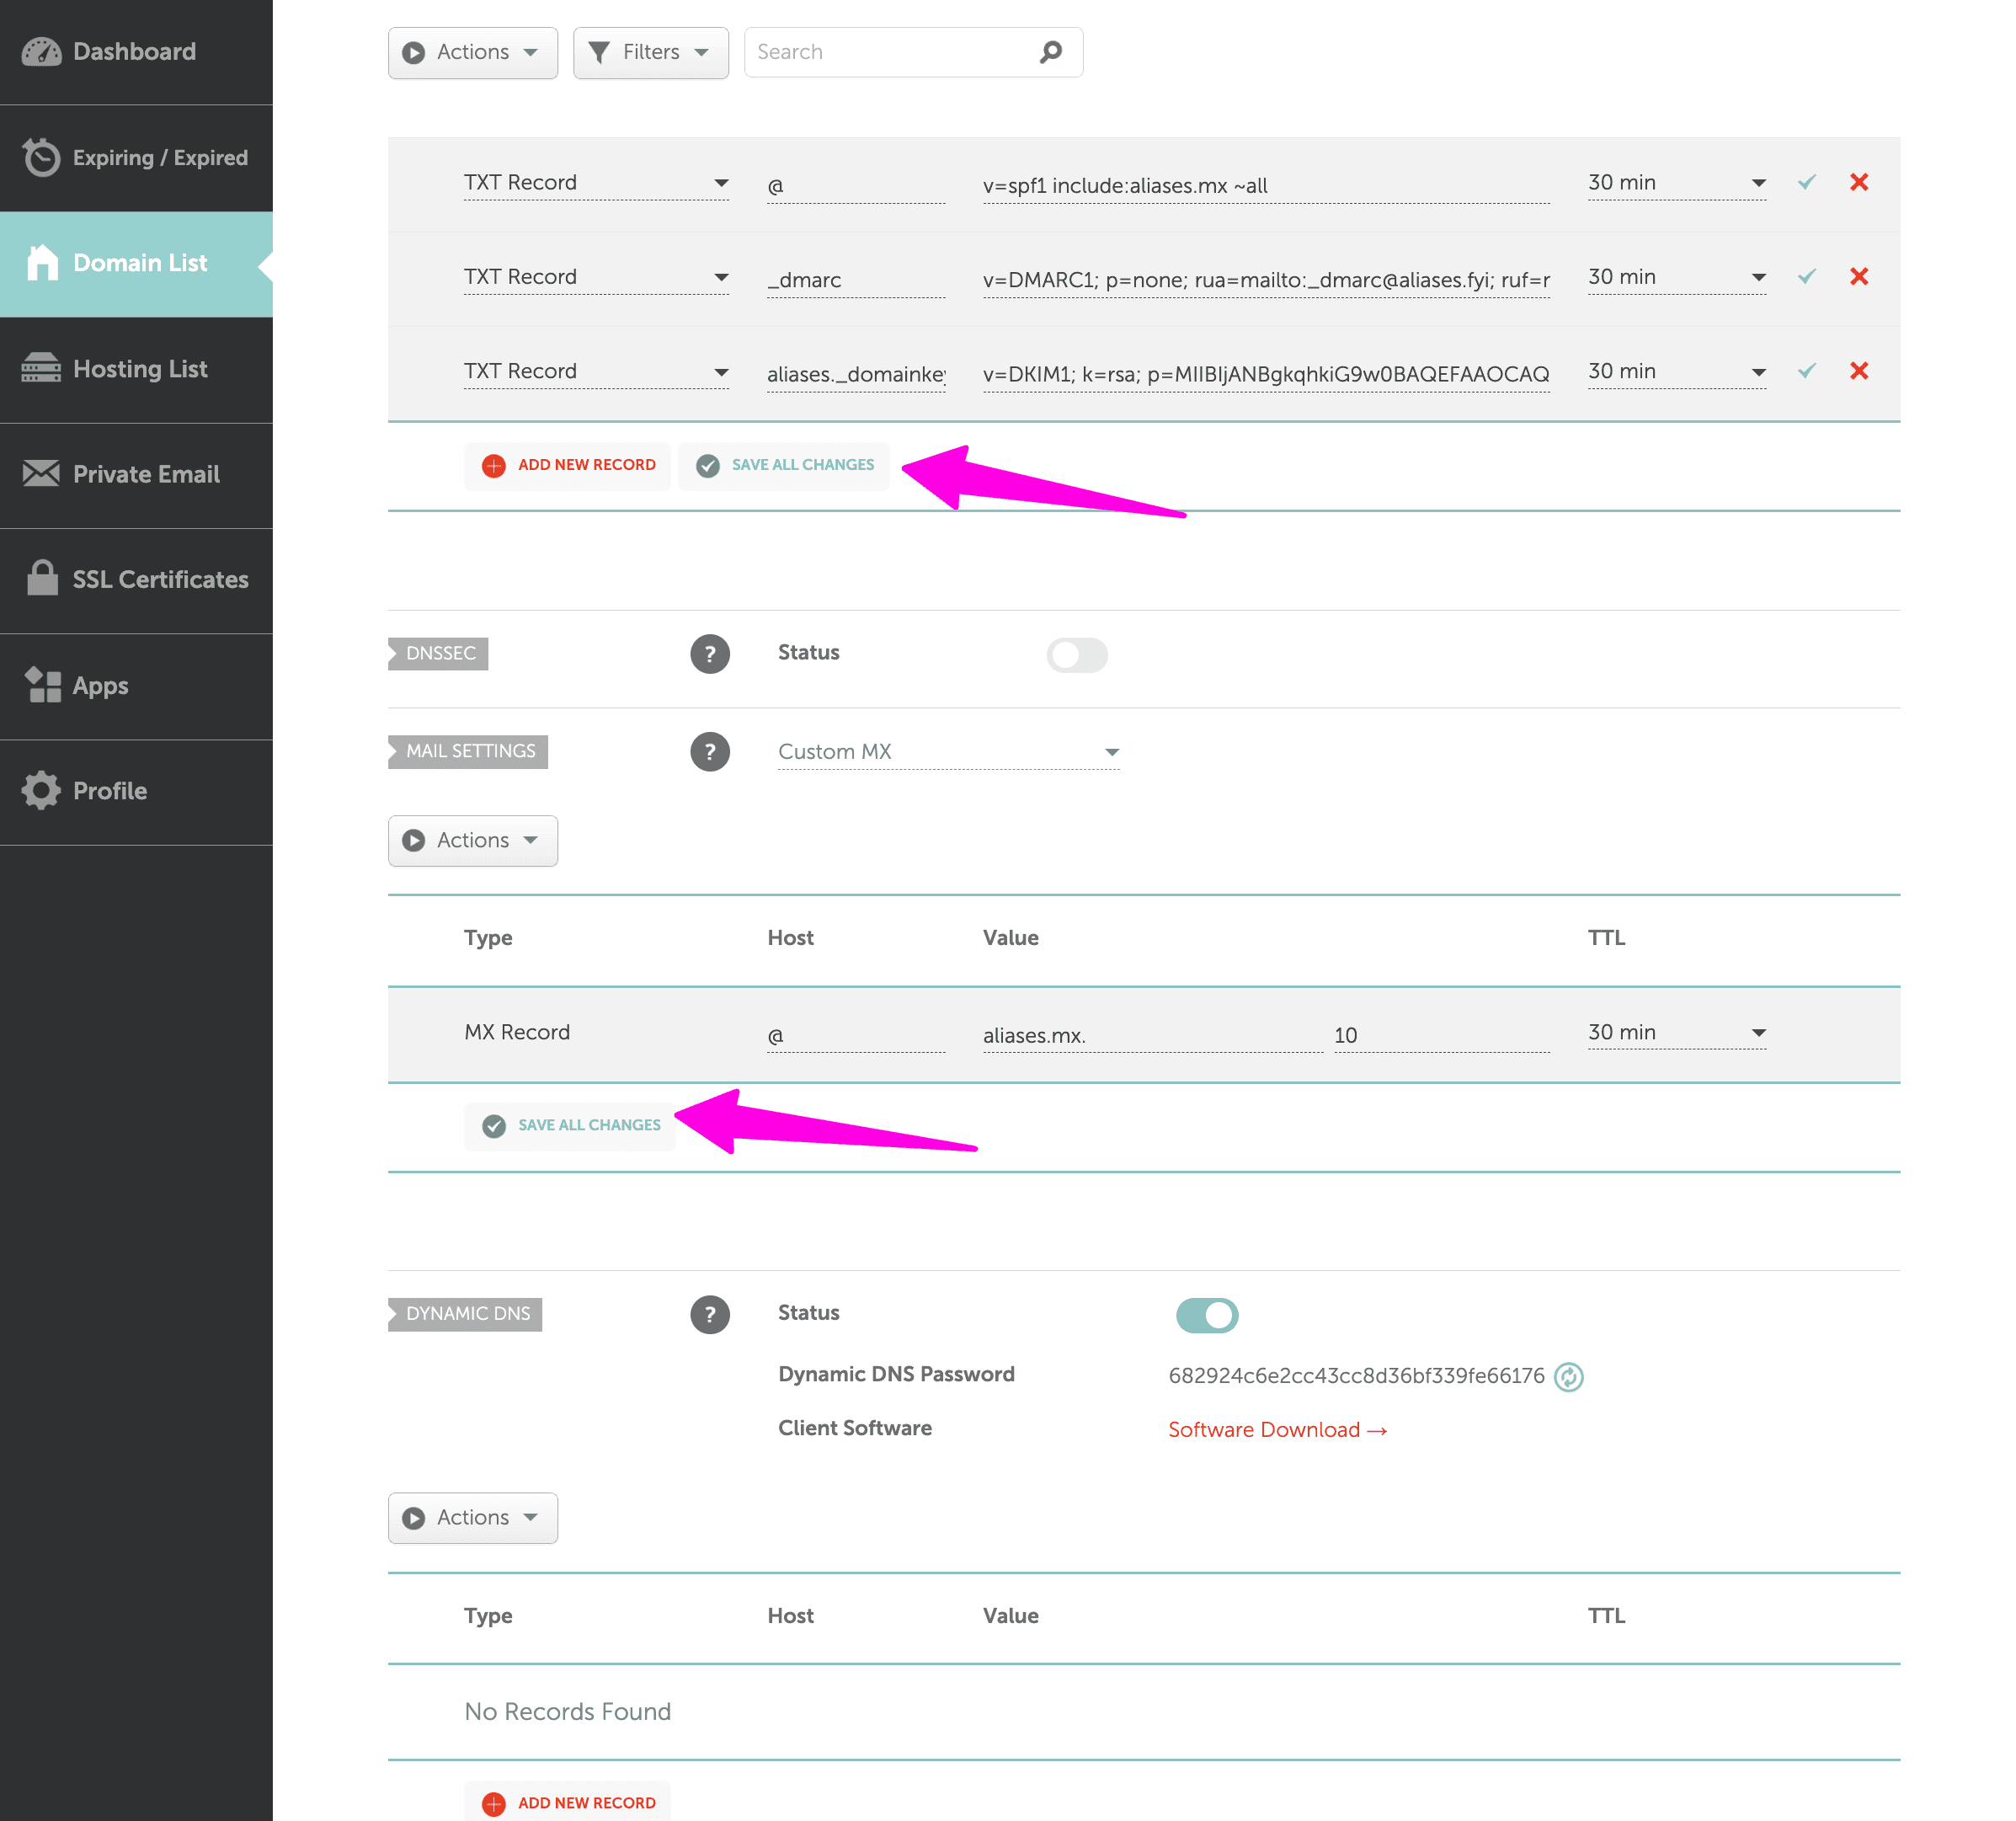
Now you'll paste those MX values from Aliases into the proper field, and set TTL to 30 min:

Now click the "Save All Changes" for both sections!
Finally head back to Aliases to active your domain.
Activate your domain
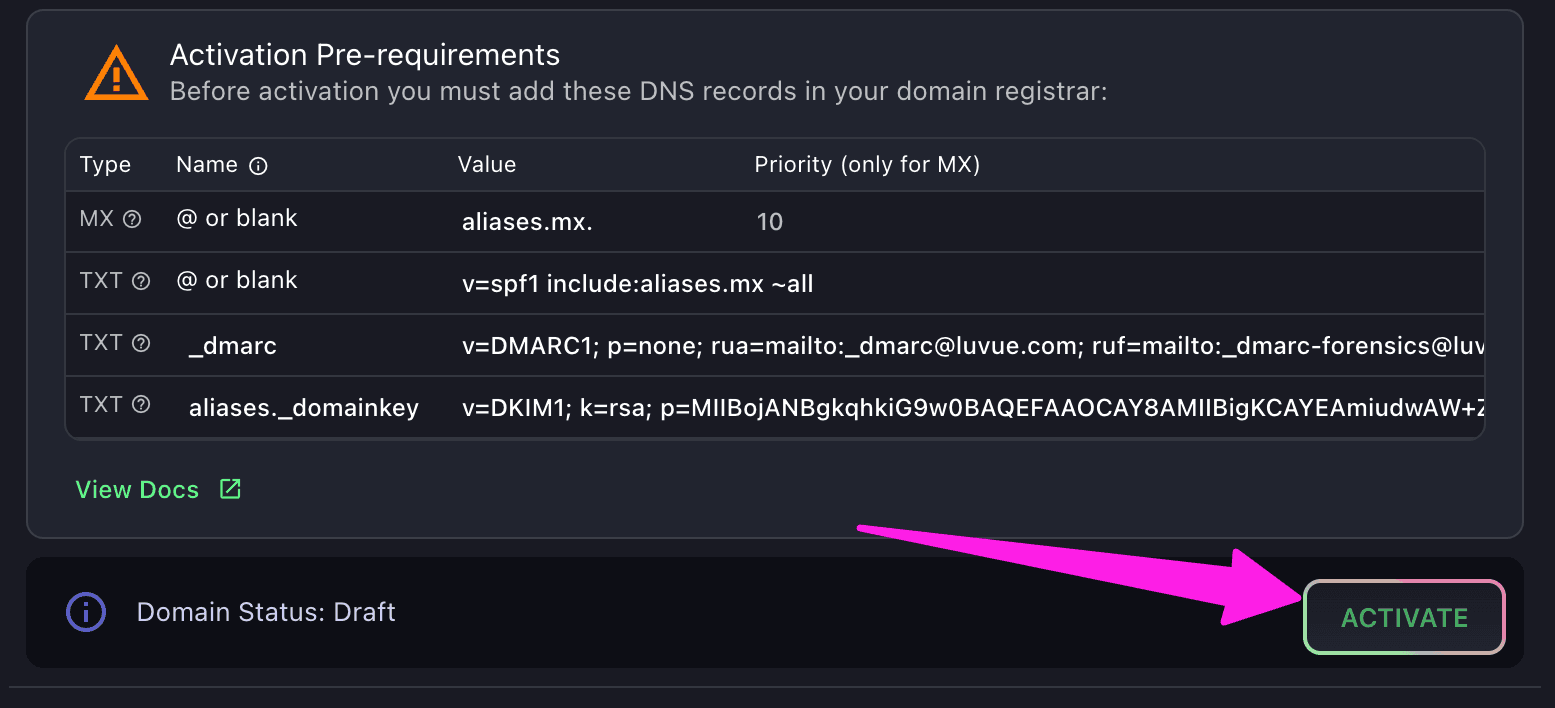
You’ll see a success message if everything went ok
and you’ll see that the Domain Status is active

If you see the error "unable to activate domain", you may need to wait a few minutes for DNS changes to propagate, or double check all your MX and TXT record settings.
Using Gmail (Google Workspaces) with NameCheap?
If you’re using Google Workspaces (Gmail), and a shortcut with domain registrars like NameCheap, you’ll need to delete the “Gmail” entry.